How to use Zeek Detect Sliver HTTP beacon traffic
废话少说,今天来给大家分享,如何利用Zeek实现对 Sliver Framework 中 HTTP C2 流量的检测。
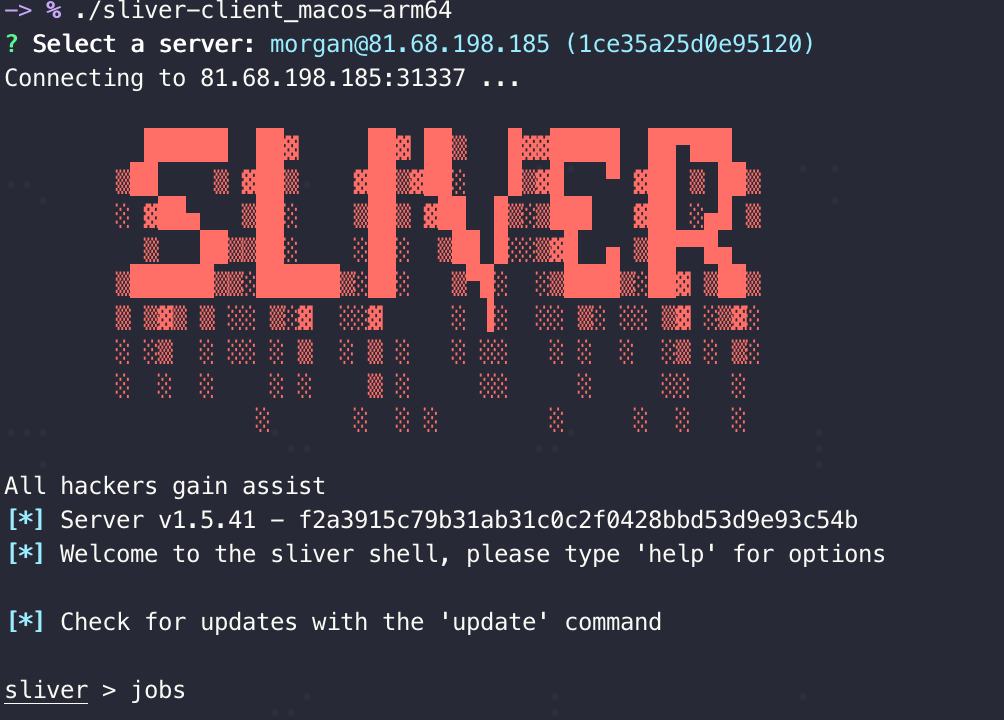
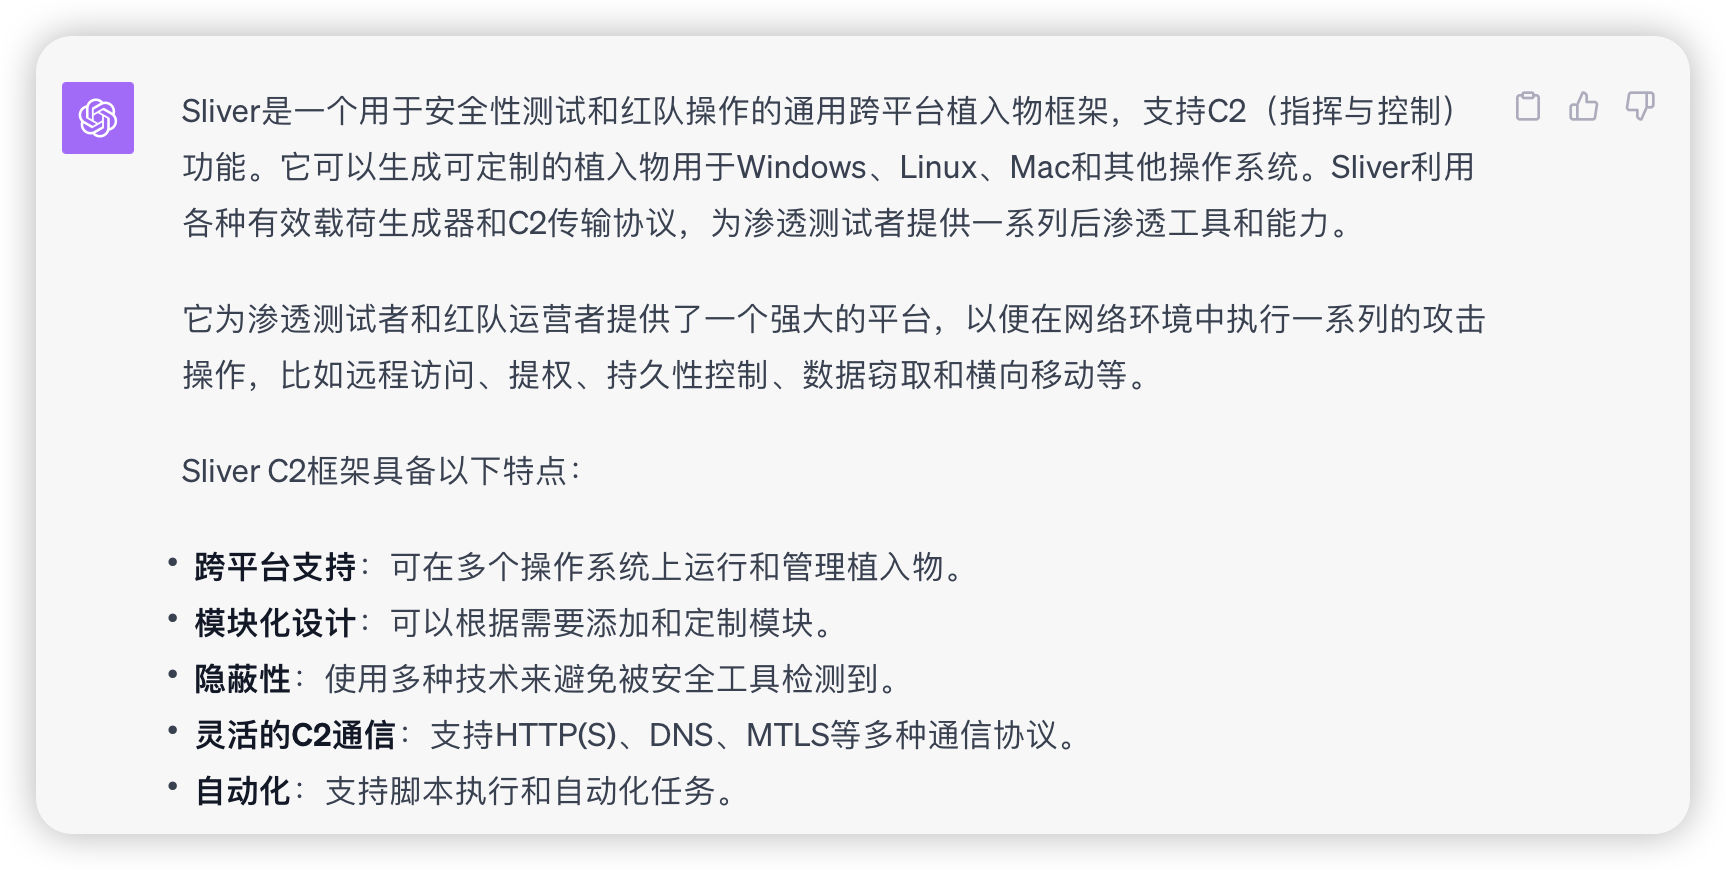
Sliver是什么?我反手就是一个GPT!
Sliver HTTP C2 流量检测思路
我们此次的检测思路是针对Sliver HTTP beacon traffic进行检测,也就是我们俗称的“心跳”包。以下为分析与检测思路:
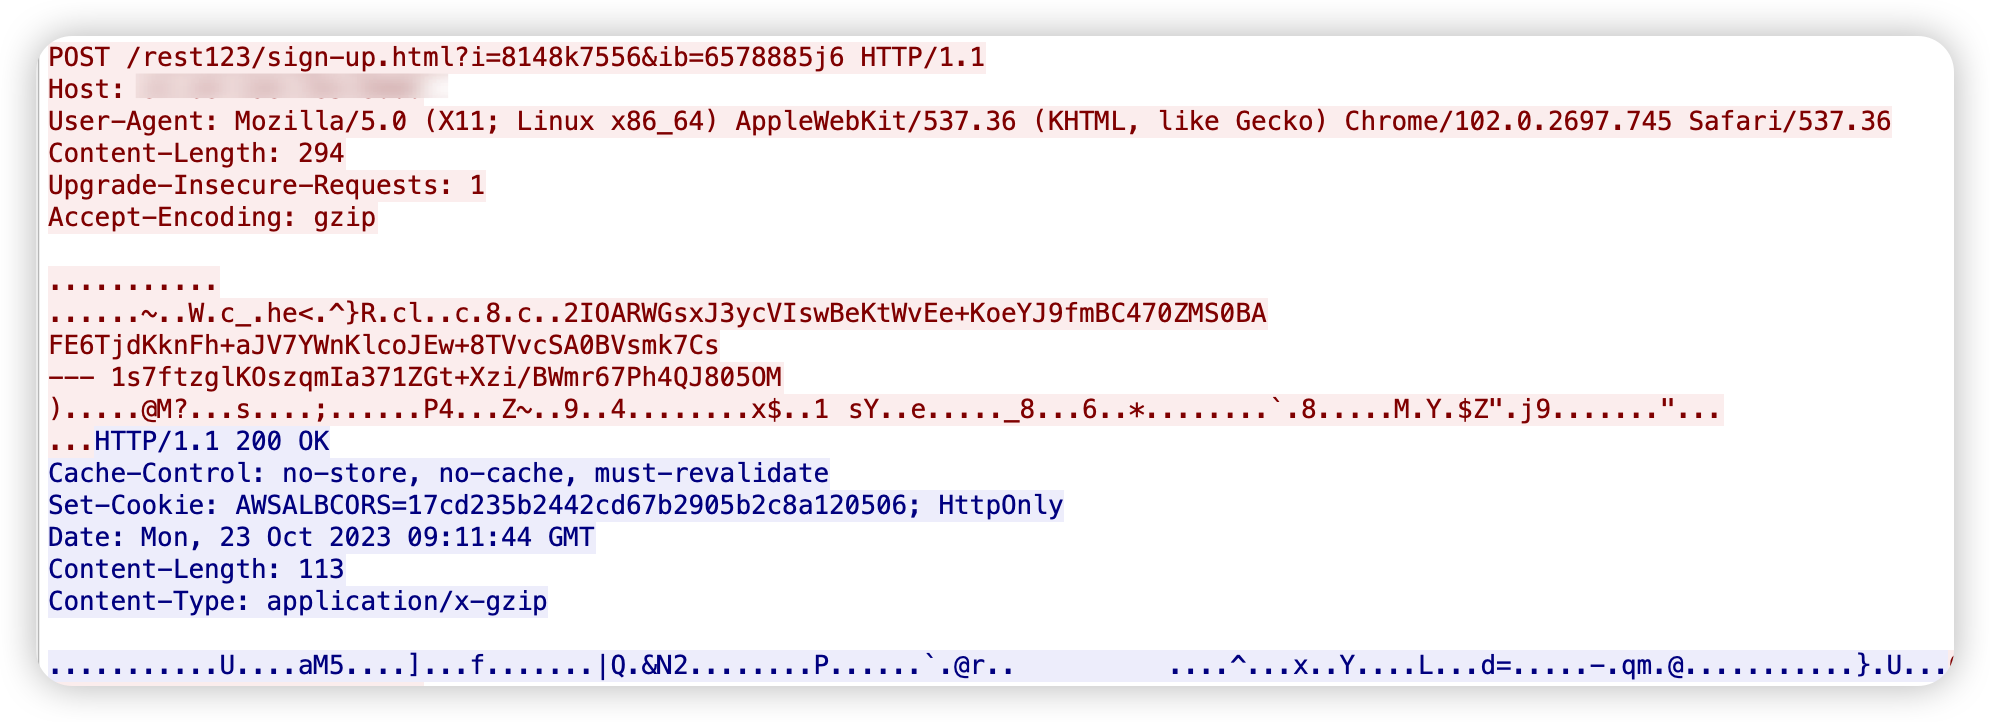
当你第一次启动时,Client 会通过一个POST请求与Server进行通讯,它的主要目的是与 Server 进行密钥(Session Key)交换。Sliver 为了规避流量检测,Client在每次连接Server时的请求都是随机的。同时 Sliver HTTP C2的定制化程度很高,用户只需修改
http-c2.json中的对应配置项即可实现uri部分的定制化。以下截图为分别3次执行Client端后的POST请求,第1张图截图是修改默认配置项之后的uri的样子。第一次:
第二次:

第三次:

如上所示,如果你想从uri(
session_paths/session_files.session_file_ext)这个角度去检测基本不太可能,因为绕过的成本太低了。所以,我们必须另辟蹊径。通过分析源码,我们将检测目标放在了这些看似“随机”生成的请求参数上。以第一次的POST请求来看,参数ib=6578885j6是基于时间戳生成的一次性密钥(TOTP),另一个参数i=8148k7556是经过混淆之后的EncoderID。其实Body的长度也是一个特征,只不过必须在解码之后才能作为特征,这里没有纳入进去是因为Zeek在有些编码上的解码暂时无法实现。
废话少说,放“码”过来
参数
ib=6578885j6是怎么来的?该参数是由 OTPQueryArgument 方法生成。此方法将会基于时间戳随机生成一个长度为2的字符串作为Key,并同时在
value(密钥)中插入0到2个随机字符作为Value。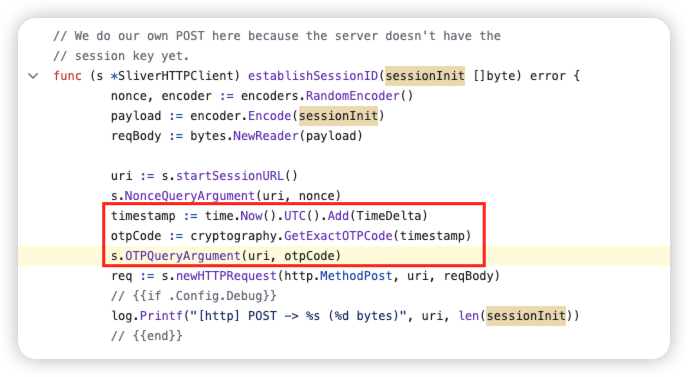
1
2
3
4
5
6
7
8
9
10
11
12
13
14
// OTPQueryArgument - Adds an OTP query argument to the URL
func (s *SliverHTTPClient) OTPQueryArgument(uri *url.URL, value string) *url.URL {
values := uri.Query()
key1 := nonceQueryArgs[insecureRand.Intn(len(nonceQueryArgs))]
key2 := nonceQueryArgs[insecureRand.Intn(len(nonceQueryArgs))]
for i := 0; i < insecureRand.Intn(3); i++ {
index := insecureRand.Intn(len(value))
char := string(nonceQueryArgs[insecureRand.Intn(len(nonceQueryArgs))])
value = value[:index] + char + value[index:]
}
values.Add(string([]byte{key1, key2}), value)
uri.RawQuery = values.Encode()
return uri
}参数
i=8148k7556是怎么来的?该参数是由 NonceQueryArgument 方法生成。此方法将会随机生成一个长度为1的字符串作为Key,并同时在
value中插入0到2个随机字符作为Value。此处value实际是通过 RandomEncoder 方法中的(insecureRand.Intn(maxN) * EncoderModulus) + encoderID代码生成的nonce数值。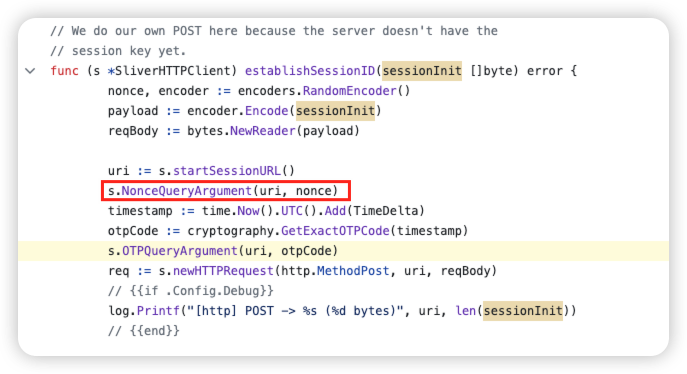
1
2
3
4
5
6
7
8
9
10
11
12
13
14
15
16
17
18
19
20
21
22
23
24
25
// NonceQueryArgument - Adds a nonce query argument to the URL
func (s *SliverHTTPClient) NonceQueryArgument(uri *url.URL, value uint64) *url.URL {
values := uri.Query()
key := nonceQueryArgs[insecureRand.Intn(len(nonceQueryArgs))]
argValue := fmt.Sprintf("%d", value)
for i := 0; i < insecureRand.Intn(3); i++ {
index := insecureRand.Intn(len(argValue))
char := string(nonceQueryArgs[insecureRand.Intn(len(nonceQueryArgs))])
argValue = argValue[:index] + char + argValue[index:]
}
values.Add(string(key), argValue)
uri.RawQuery = values.Encode()
return uri
}
// RandomEncoder - Get a random nonce identifier and a matching encoder
func RandomEncoder() (int, Encoder) {
keys := make([]int, 0, len(EncoderMap))
for k := range EncoderMap {
keys = append(keys, k)
}
encoderID := keys[insecureRand.Intn(len(keys))]
nonce := (insecureRand.Intn(maxN) * EncoderModulus) + encoderID
return nonce, EncoderMap[encoderID]
}Encoder Map:
ID Encoder 13 Base64 with modified alphabet 22 PNG 31 English words 43 Base58 with modified alphabet 45 English words + Gzip compression 49 Gzip compression 64 Base64 + Gzip compression 65 Base32 + Gzip compression 92 Hex 所以,我们根据代码片段可以反向推导出这个
nonce值实际是对应到了Sliver中的encoderID。1
2
3
4
5
6
7
8
9
10
11
12
13
14
15
16
17
18
19
20
21
22import re
encoders = {
13: "b64",
31: "words",
22: "png",
43: "b58",
45: "gzip-words",
49: "gzip",
64: "gzip-b64",
65: "b32",
92: "hex"
}
def decode_nonce(nonce_value):
"""Takes a nonce value from a HTTP Request and returns the encoder that was used"""
nonce_value = int(re.sub('[^0-9]','', nonce_value))
encoder_id = nonce_value % 101
return encoders[encoder_id]
In [1]: decode_nonce("8148k7556")
Out[1]: 'gzip'POST Body里面有什么?这些数据是怎么来的?
- 先回答第一个问题,POST Body里面是一个长度为266个字节的加密数据。
- 关于第二个问题,我按照我的理解给大家画了一个POST Body数据生成的Workflow。来来来,我们看图说话:
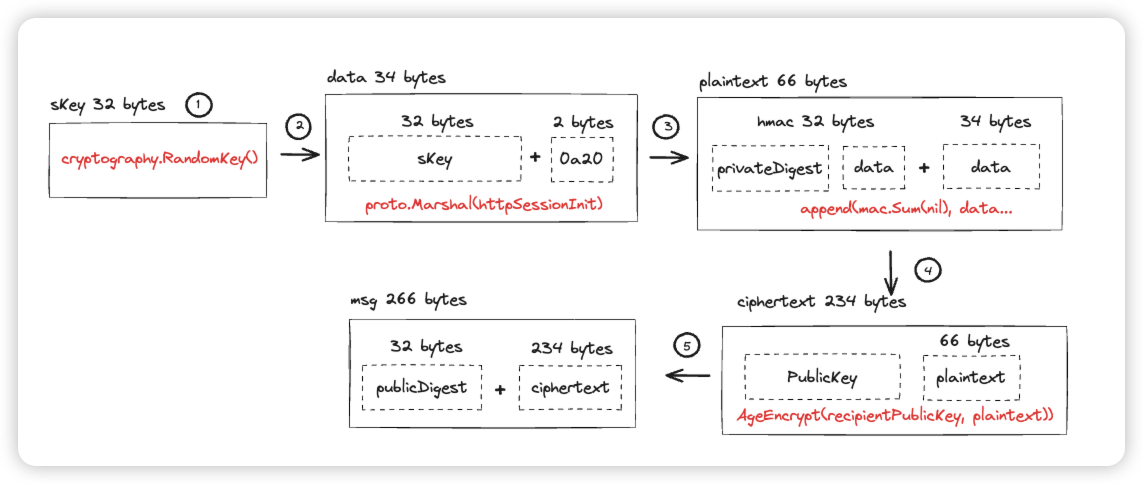
第1步:Client通过 cryptography.RandomKey() 方法随机生成一个32字节的
sKey,这个sKey很重要后续的命令执行都会通过这个sKey进行加密。由于这里采用的是对称加密,所以解密也会用到这个sKey。这也就解释了为什么我们说第一次的POST请求是交换密钥,因为Server需要这个sKey做后续请求内容的解密。1
2
3
4
5
6
7
8sKey := cryptography.RandomKey()
// RandomKey - Generate random ID of randomIDSize bytes
func RandomKey() [chacha20poly1305.KeySize]byte {
randBuf := make([]byte, 64)
rand.Read(randBuf)
return deriveKeyFrom(randBuf)
}第2步:通过 proto.Marshal() 方法对第一步生成的
sKey进行序列化,这时候sKey的长度从32字节变成了34字节。1
2
3s.SessionCtx = cryptography.NewCipherContext(sKey)
httpSessionInit := &pb.HTTPSessionInit{Key: sKey[:]}
data, _ := proto.Marshal(httpSessionInit)关于为什么会多出2个字节
0a20?我反手就是一个ChatGPT。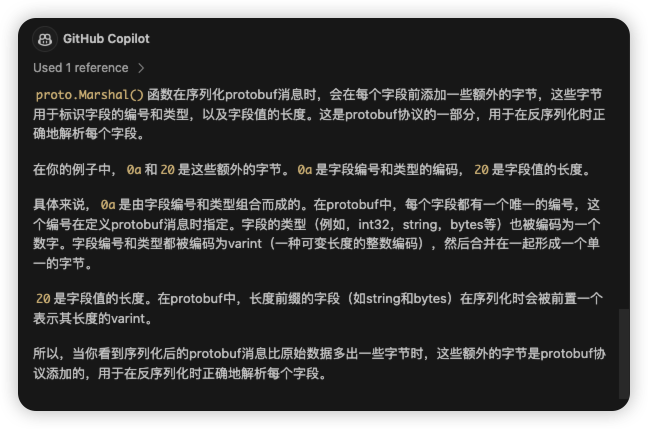
第3步:通过HMAC(Hash-based Message Authentication Code)来保证
sKey完整性和真实性。- 首先创建了一个新的HMAC实例
- 接着使用implant’s private key的哈希值作为HMAC的密钥
- 最后对
plaintext处理得到HMAC值
1
2
3
4
5
6
7
8peerKeyPair := GetPeerAgeKeyPair()
// First HMAC the plaintext with the hash of the implant's private key
// this ensures that the server is talking to a valid implant
privateDigest := sha256.New()
privateDigest.Write([]byte(peerKeyPair.Private))
mac := hmac.New(sha256.New, privateDigest.Sum(nil))
mac.Write(plaintext)第4步:通过 AgeEncrypt() 方法,使用Server Public Key对
plaintext进行加密。通过源码可以看到这里将HMAC值(32字节)添加到plaintext消息的前面。这样做是为了确保消息的完整性,Server端只需用同样的方法计算HMAC值并与plaintext中的前32字节进行对比,就可以知道消息在传输过程中是否被篡改。1
2
3
4
5
6
7
8
9
10
11
12
13
14
15
16
17
18
19
20
21
22
23
24ciphertext, err := AgeEncrypt(recipientPublicKey, append(mac.Sum(nil), plaintext...))
// AgeEncrypt - Encrypt using Nacl Box
func AgeEncrypt(recipientPublicKey string, plaintext []byte) ([]byte, error) {
if !strings.HasPrefix(recipientPublicKey, agePublicKeyPrefix) {
recipientPublicKey = agePublicKeyPrefix + recipientPublicKey
}
recipient, err := age.ParseX25519Recipient(recipientPublicKey)
if err != nil {
return nil, err
}
buf := bytes.NewBuffer([]byte{})
stream, err := age.Encrypt(buf, recipient)
if err != nil {
return nil, err
}
if _, err := stream.Write(plaintext); err != nil {
return nil, err
}
if err := stream.Close(); err != nil {
return nil, err
}
return bytes.TrimPrefix(buf.Bytes(), ageMsgPrefix), nil
}第5步:这段代码构建了一个消息
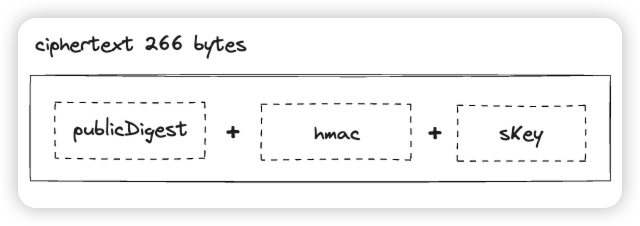
msg,这个msg也就是Body在编码之前的样子。该消息包含了implant’s public key的HASH值和加密后的数据,总长度266字节。C2 Server 可以通过对比前32个字节中的HASH值来验证implant’s public key的真实性,并使用Server Pivate Key解密后面的数据。1
2
3
4
5// Sender includes hash of it's implant specific peer public key
publicDigest := sha256.Sum256([]byte(peerKeyPair.Public))
msg := make([]byte, 32+len(ciphertext))
copy(msg, publicDigest[:])
copy(msg[32:], ciphertext)最后的最后,Client会通过encoder.Encode()方法将266个字节的加密数据进行编码,所以我们捕获流量看到的PCAP数据已经不是“最初”的样子了,因为这段数据已经被编码过了。
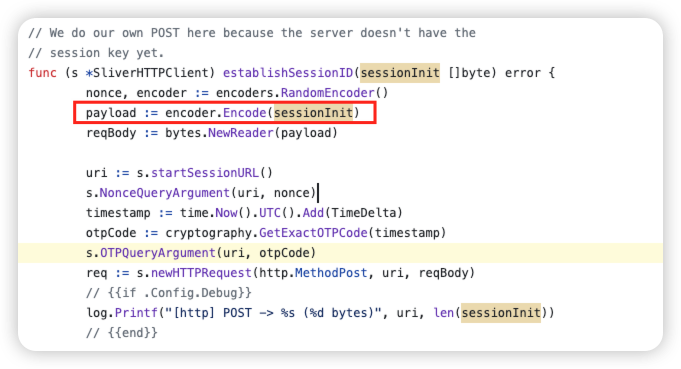
结论:当你看完这部分源码后你其实会发现,整个过程都是为了保护这个sKey不被泄露。最终我们可以得出一个简单的数据结构图,POST Body由截图中的3个部分组成。
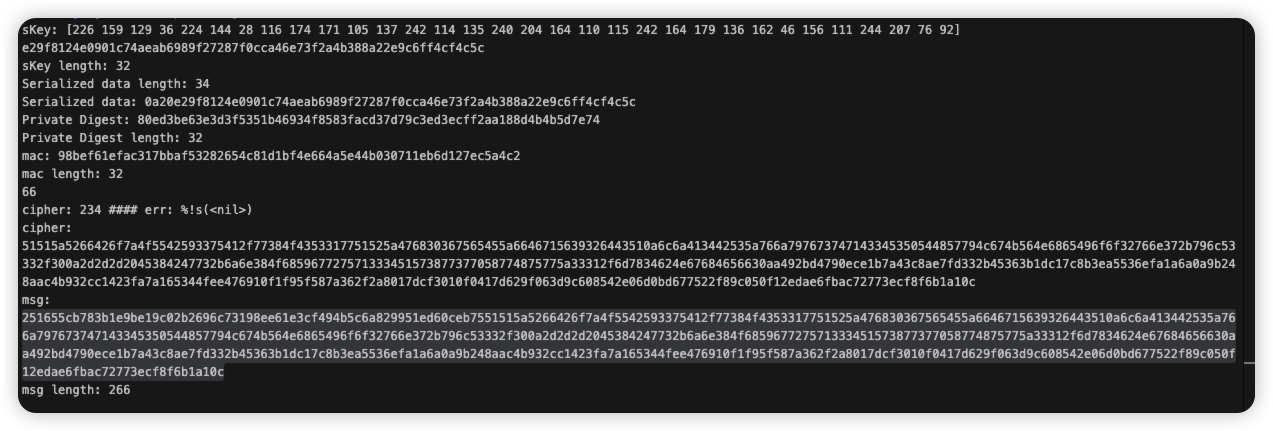
这是我模拟加密过程的输出,其中每个阶段的字节数都已经打印在界面上。
结合上面的分析,我们可以抽象出对第一个POST请求的检测特征,如下图所示:

Zeek 代码
1
2
3
4
5
6
7
8
9
10
11event http_message_done(c: connection, is_orig: bool, stat: http_message_stat) {
if (c$http$method == "POST" &&
c$http$status_code == 200 &&
c$http?$set_cookie &&
is_suspicious_cookie(c$http$set_cookie) &&
is_suspicious_query(c$http$method, c$http$uri)) {
# record suspicious connections
http_connection_state[c$http$uid] = split_string(c$http$set_cookie, /;/)[0];
}
}
在完成第一个可疑连接的捕获之后,接下来我们需要把重心回答如何检测HTTP的”信标“流量上了。(其实这里已经简单很多了,最难的其实是交换密钥的特征)如下图,我们可以把POST之后的GET请求可以看做都是“信标”通信流量。Sliver会采用“抖动”的方式规避基于周期性的检测,当然也包括uri的随机性。
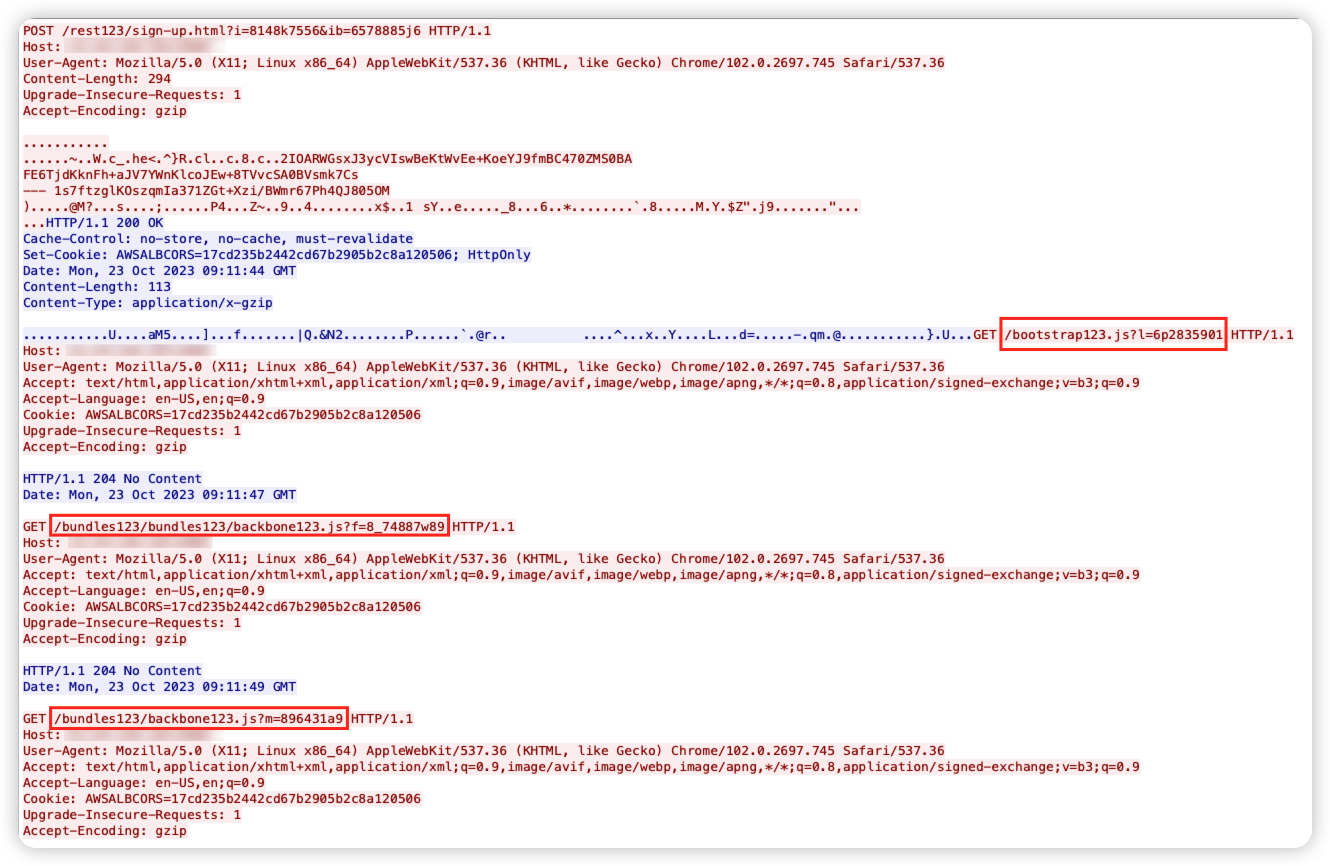
如上图,截图中的3个GET请求中每次的uri都是随机的,每次的编码方式也是随机的。好在这里对于“信标”特征的检测思路,可以复用之前参数检测的部分。所以,GET请求中的参数是通过NonceQueryArgument 方法生成的。
1
2
3
4
5
6
7
8
9
10
11
12
13
14// NonceQueryArgument - Adds a nonce query argument to the URL
func (s *SliverHTTPClient) NonceQueryArgument(uri *url.URL, value int) *url.URL {
values := uri.Query()
key := nonceQueryArgs[insecureRand.Intn(len(nonceQueryArgs))]
argValue := fmt.Sprintf("%d", value)
for i := 0; i < insecureRand.Intn(3); i++ {
index := insecureRand.Intn(len(argValue))
char := string(nonceQueryArgs[insecureRand.Intn(len(nonceQueryArgs))])
argValue = argValue[:index] + char + argValue[index:]
}
values.Add(string(key), argValue)
uri.RawQuery = values.Encode()
return uri
}源码中关于beacon的默认设置
BeaconInterval: 轮训时间 3sBeaconJitter:抖动时间 4s
1
2
3
4
5
6
7
8message ImplantConfig {
string ID = 1;
bool IsBeacon = 2;
int64 BeaconInterval = 3;
int64 BeaconJitter = 4;
...
}结合上面的分析,我们可以抽象出对”信标“请求的流量检测特征,如下图所示。

Zeek 代码
1
2
3
4
5
6
7
8
9
10
11# Event handler to process and inspect completed HTTP messages
event http_message_done(c: connection, is_orig: bool, stat: http_message_stat) {
if (c$http$method == "GET" && c$http$status_code == 204 && c$http?$cookie &&
(c$http$uid in http_connection_state) &&
(c$http$cookie == http_connection_state[c$http$uid])) {
local key_str = fmt("%s#####%s#####%s#####%s#####%s",
c$http$uid, c$id$orig_h, c$http$host, c$id$resp_p, c$http$cookie);
local observe_str = c$http$uri;
}
}
难点:
- 问:如何在同一个TCP连接中,关联多个HTTP请求的上下文,实现场景的判断?
答:这里可以尝试通过维护一个HTTP状态表来实现同一个uid下的多个HTTP请求关联。例如,将符合阶段-1的处理结果存储到http_connection_state中,后续只需通过检查HTTP状态表中的状态来执行之后的逻辑。
1 | ## Global table to store cookie state. |
- 问:如何避免http_connection_state set无限扩大,降低”无效”uid的填充set?
答:对于这个问题,可以使用Zeek的create_expire属性,用它来管理整个http_connection_state set的生命周期。按照我们之前的分析,Sliver的HTTP C2流量在密钥交换之后,会进行C2数据包轮训,“信标”时间会有1~4秒抖动。所以,我们可以给这个可疑uid设置一个create_expire属性。如:create_expire=300sec,那么300秒之后我们会自动删除http_connection_state 中的 http_uid,通常这个时间内已经足够我们判断该HTTP请求流中是否为Sliver HTTP beacon traffic了。
1 | ## Global table to store cookie state. |
- 问:如何实现对规则的快速启停以及调整,避免规则更新重启整个Zeek集群?
答:这里建议使用Zeek的Configuration Framework,只需将规则中的配置写入到文件中,后续只需要更改配置文件就可以实现”热“加载,从而不需要对Zeek进行deploy。
1 | ## Define module-level configuration options. |
- 问:如何让规则只对指定的Zeek Worker生效?例如,我的环境中有30台Zeek,但是实际接入内对外流量Zeek只有2台,剩下都是外对内的流量。
答:可以在代码中增加针对Zeek机器IP的判断,只针对指定的Zeek Worker IP进行规则的生效。这样一来,该规则也只需要在内对外的2台Zeek上生效,避免在负载很高的外对内的Zeek Worker上进行计算。
1 | event http_message_done(c: connection, is_orig: bool, stat: http_message_stat) { |
问:如何解码请求参数中的EncoderID?
答:废话少说,放“码”过来
Zeek Code
1
2
3
4
5
6## Decode nonce value to identify the encoder used in traffic encoding.
function decode_nonce(nonce: string): int {
local nonce_value = to_int(gsub(nonce, /[^[:digit:]]/, ""));
return nonce_value % 101;
}Python Code
1
2
3
4
5
6
7
8## Decode nonce value to identify the encoder used in traffic encoding.
import re
def decode_nonce(nonce_value):
"""Takes a nonce value from a HTTP Request and returns the encoder that was used"""
nonce_value = int(re.sub('[^0-9]','', nonce_value))
return nonce_value % 101
问:如何解码Post Body中的内容?
答:详细参考这个文章吧 Solución al reto Sliver Forensics de #hc0n2023
Detect Sliver HTTP beacon traffic (Demo) 检测代码
1 | ## Module to detect Sliver HTTP traffic based on specific criteria. |
“看疗效”

写在最后
感觉以后自己越来越少机会写这些了。。。但我还是想说:开源是“理念”,分享是“精神”。请让专业的人做专业的事!
